


Step 4 – Generate SSH Key Pairs
macOS
Open your Terminal and generate the keys using the following commands:
|
1 |
localhost~$ ssh-keygen -t rsa -b 4096 -f "NonRootKey" |
It will ask you for a passphrase to secure your key with. You may opt leave it blank, but it is highly advisable to protect your key with a passphrase to prevent others from using it.
This command will create a key pair – a private key “NonRootKey” and a public key “NonRootKey.pub“. You should keep your private key offline and away from anyone who should not have access to your box.
On the other hand, the public key needs to be copied to your server. Do this manually by copying the contents of NonRootKey.pub to your server.
|
1 |
localhost~$ cat NonRootKey.pub |
The output would be similar to the gibberish block of text below. Manually copy it to your clipboard.
|
1 |
ssh-rsa AAAAB3NzaC1yc2EAAAADAQABAAACAQD6MEHuYehiiWFuI7hsXL13FFb3BoRPeNySE2sLk114LINXOZ4V7CfJMR84tmFZbv5/vdK1JOeZ+D2aBB2H1SmK6/jqdQ8/ZTUl1iCOFBFT/UMu3HChw3KTPygk7ASCc9hd2TRTzBQgPc467IpCXsQzwp2rF2Rt41arpwU569TeQkXBoh/eL+ORkA0BobGBNeM29nHAE9CoZSjREFYlNEFx6rn1Ok7yz34iFenIIQyMgYrBVtwzZRm2ScFXAm88dB/H9A3GuwqLxibiQyy1LxCJbOGM4HMOKzphoVI34CSsVsUUEh/paAyrpS3fSQDfpSYc5656N5Fi+46Q+Lm+BTiFdQ8yazmxrre18gYZAGL9Tmb9uK8M5oNMvAP2PPn9jZAM3q18vVsfZJYMrbAkNKqLFGxnG28l0KbsLg8fO7+VHO2//hmxaYJ8CBMkCFLE/pKV18YcCTHibPa45VmMYHfXQA7i+AAI/Usmdmv30IB8Xan4vPAhpgzpSY5YCxcbsC+o5KSDFO/LOLBVZ4b+CMXY6dS8b3YInZC6meJpm7kCawZEBzZYa/EsjCgqxdSyO1X9WB+ru6LrCdcn9xqvNBlBdThXpBESi65ym1pvbkmubo4FzRQswoIjkE7WJzCNQnJJuApgzqVmwMwIseDB0bdk3GJeAiJY+uEcWn8muqL5/w== |
Skip the Windows guide below and proceed to the “Associate Public Key with the Server” section.
Windows
If you are using a Windows, and installed the full PuTTY package, most probably you already have the tool called PuTTYgen. It is a straight-forward tool for key generation.
Just open the tool and you will see something like this:
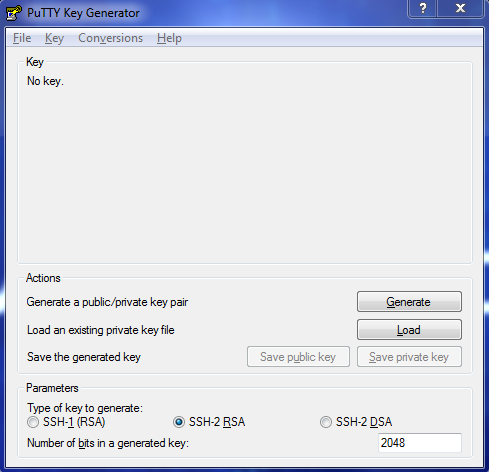
At the bottom, you will see the option on how much size your generated key would be. By default, it is set to 2048 bits. I personally want to set it to 4096. After setting the key size, click the Generate button.
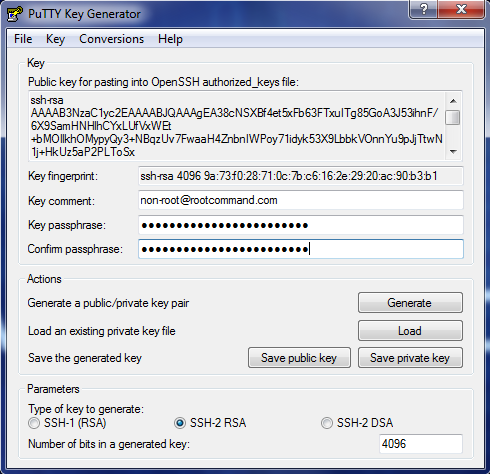
Before saving your key, it is recommended to set the following the Key comment and the Key passphrase.
Save the private key.
As for the public key, go back to your PuTTYgen window and copy the text below the section that says “Public key for pasting into OpenSSH authorized_keys file:” to your clipboard.
Fire up PuTTY and connect to your Ubuntu server with your non-root user.
Associate Public Key with the Server
Once you are logged in to your server’s terminal, we need to create and paste the public key to the user’s ~/.ssh/authorized_keys.
|
1 2 3 |
USERNAME@server~$ mkdir ~/.ssh USERNAME@server~$ chmod 700 ~/.ssh USERNAME@server~$ vim ~/.ssh/authorized_keys |
Paste the public key on this new file and save it afterwards.
Lastly, we need to restrict the permission of this file so that only the user would be able to read and write into it.
|
1 |
USERNAME@server~$ chmod 600 ~/.ssh/authorized_keys |
Step 5 – Disable Root Login and Password Authentication
Root user has the privilege to access and execute every command available in your Ubuntu server. Anyone who gain unauthorized access to the root user would be able to take over your server completely and do whatever they want. One of the most important step in hardening your server is to disable root remote login on your system. Though there are several ways to gain escalated-privilege access to a box, ticking this off the list would add both a layer of security and a level of difficulty for possible attackers trying to pawn your box.
Here’s how you do it: vim /etc/ssh/sshd_config
|
1 2 3 4 5 6 |
Port SSHD_PORT # Uncomment/Adjust/Append the following directives PermitRootLogin no PasswordAuthentication no UseDNS no |
SSHD_PORT is the same one you set in Step 1.
Once you have saved the changes, restart the SSH daemon and CSF.
|
1 2 |
root@server~$ systemctl restart sshd root@server~$ csf -r |
At this point, you already have a secured server which you can use in whatever way you want. You may host your own WordPress blog using Nginx webserver or create a personal VPN tunnel provider. Whatever you would like to do with it, you should start by putting some layers of security in place.
I hope this guide has been able to walk you through the initial setup of your Ubuntu 16.04 LTS server.


