


Kali Linux is a Debian-based Linux distribution specifically tailored for penetration testing and security auditing tasks. It comes with suite of information security tools pre-installed.
Dual-booting or creating a live CD/USB is what most people do to have a Kali Linux at their disposal. But what if you are bored in your hotel room and you wanted to test something just to find out you do not have your live USB with you? Did you ever think of having a round-the-clock server that you can access wherever and whenever you want without running a physical server at home? How about running a test through an SSH client from any smartphone you have? The solution – host it in the cloud. With cloud hosting, you can fire up a Kali instance within minutes. For just a fraction of a penny an hour, you can have a suite of security tools in the cloud. With the versatility of cloud VPS, you can just deploy and dispose after use.
There are a handful of good guides on how you can install a full Kali Linux (with a desktop environment) in the cloud. You can even run it in Microsoft Azure for free by taking advantage of their free trials. Though it seems to be a steal, it would cost you more in the long run.
This leads me to look for ways on how to host a lightweight, headless Kali Linux in other cloud providers. I did not find a reliable and relatively easy guide to do this. In turn, I just experimented on my own to achieve my goal. So here’s a guide on how I did it.
Procedures:
- Register at Vultr
- Upload a Custom ISO
- Deploy a Kali Linux Instance
- Enable SSH
- Install Kali Packages
Step 1 – Register at Vultr
Vultr is a cloud provider company within the same category as DigitalOcean and Linode. Though it is new (launched in February 2014), it has been very successful in providing it’s costumers a reliable service.
The primary reason I chose is the ability to easily upload (or rather download) and deploy any custom ISO. With an hourly price of $0.007, you would get a 768MB-RAM instance as compared to competitors’ 512MB instances of the same price.
With all the benchmark, comparisons and reviews, I did not hesitate and gave this cloud host a try.
At the time of writing this, they are offering a FREE $50 credit that you can use to try their service.
Step 2 – Upload a Custom ISO
Once you have registered an account, login to the control panel and go to the Servers > ISO tab. From there you will have the option to upload a custom ISO by providing the direct download link of the image.
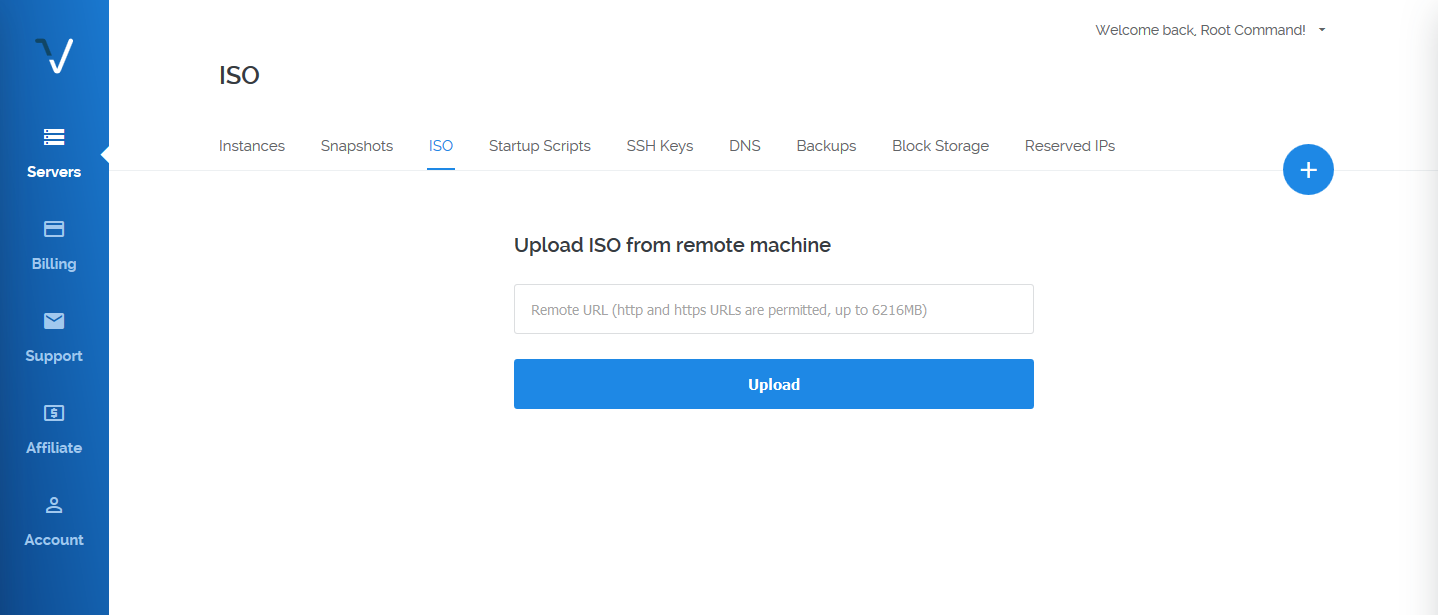
Next, you need to get the direct download url of the Kali Linux image. For this, you will need to get the “mini” version of the image instead of the full ISO. The main reason why you would want to get the mini version instead of the full version is to avoid automatic installation of Kali’s default desktop environment – GNOME.
Instead of going to Kali’s Ofiicial Download Page, get the image from their repository. Right click on the “mini.iso” and copy its link. Paste it in Vultr’s Control Panel and select Upload.
Step 3 – Deploy a Kali Linux Instance
Once the Kali Linux image is uploaded in your account, you are now ready to deploy a server instance using the custom ISO.
- Click on the + sign at the upper right side of the control panel.
- Choose your preferred server location.
- On the “Server Type”, choose “Custom ISO” and select the mini.iso.
- Select your preferred server size. The $5 instance would be sufficient.
- Enable additional features if you want to.
- Set the hostname and the label to identify your instance.
- Click “Deploy Now”
By now, your server is up and running with the Kali image mounted to the instance. Proceed with the installation via console. Go to the Servers section of the control panel and click label of the Kali instance you just created. You would be redirected to a page where you could see the details and statistics of your server. Click on the “View Console” icon in menu located at the upper right of the page.
Complete Kali installation via console connection.
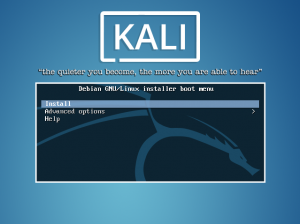
From the splash screen, select “Install”
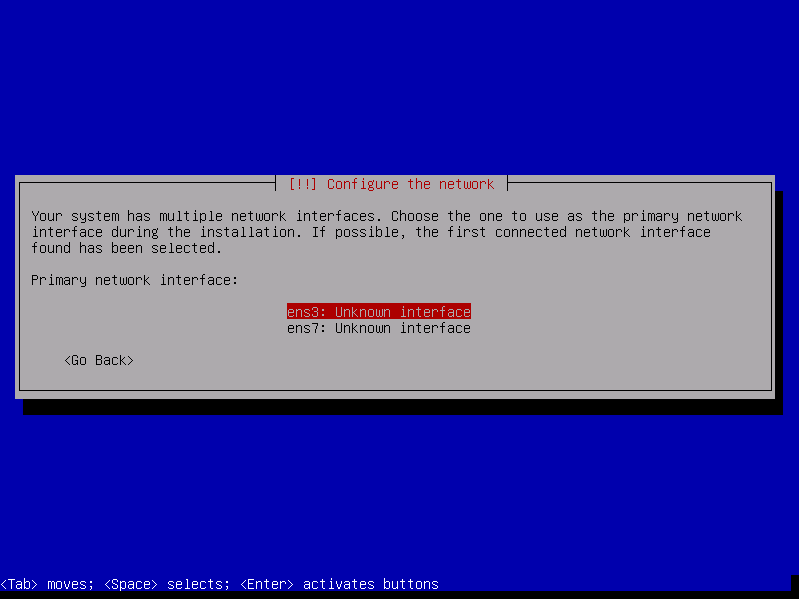
Proceed with the next steps based on your preference. During the installation, just choose leave most of the options at their default value. You will reach a section where it would ask you for the primary network interface. Choose “ens3”.
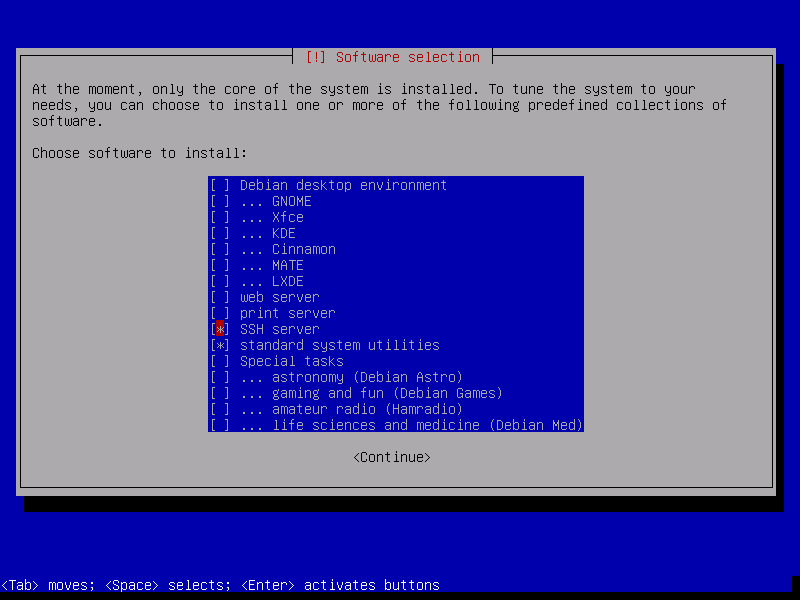
When you reach the “Software selection”, only select “SSH server” and “standard system utilities”.
Step 4 – Enable SSH
SSH is not enabled by default. At this moment, the only way to access your box is via the web console. Login to your box using the root user and let us configure and enable the SSH daemon.
|
1 |
root@kali:~# nano /etc/ssh/sshd_config |
Inside the sshd_config file, edit the following directives:
|
1 2 3 4 5 |
# Change the default port to any port you want from 1024-65565 Port 65535 # Allow root login PermitRootLogin yes |
Exit by pressing CTRL + x and Y when ask to save the changes.
Start the SSH daemon and enable it on startup.
|
1 2 |
root@kali:~# systemctl start ssh root@kali:~# systemctl enable ssh |
While still in the console, take the time to get your public ip by running the following:
|
1 |
root@kali:~# curl http://icanhazip.com |
The output of this command is your server’s IP address. Copy it as you will use it to login to your server using SSH. Logout and exit the web console.
Now, Open your Terminal (macOS or Unix-based OS) or your PuTTY (Windows). Login to your Kali box using the IP address you copied earlier. The port is the one you set in the sshd_config file.
Step 5 – Install Kali Packages
You now have a bare Kali linux without anything in it. List and install the kali packages with this command:
|
1 2 3 4 5 6 7 8 9 10 11 12 13 14 15 16 17 18 19 20 21 22 23 24 25 26 27 |
root@kali:~# apt-cache search kali meta # Output kali-desktop-common - Meta-package with dependencies common to all desktops provided by Kali kali-desktop-gnome - GNOME based Kali desktop kali-desktop-kde - KDE based Kali desktop kali-desktop-live - Meta-package for Kali live images kali-desktop-lxde - LXDE based Kali desktop kali-desktop-xfce - Xfce based Kali desktop kali-linux - Kali Linux base system kali-linux-all - Kali Linux - all packages kali-linux-forensic - Kali Linux forensic tools kali-linux-full - Kali Linux complete system kali-linux-gpu - Kali Linux GPU tools kali-linux-nethunter - Kali Linux Nethunter tools kali-linux-pwtools - Kali Linux password cracking tools kali-linux-rfid - Kali Linux RFID tools kali-linux-sdr - Kali Linux SDR tools kali-linux-top10 - Kali Linux Top 10 tools kali-linux-voip - Kali Linux VoIP tools kali-linux-web - Kali Linux webapp assessment tools kali-linux-wireless - Kali Linux wireless tools linux-headers-4.7.0-kali1-all - All header files for Linux 4.7 (meta-package) linux-headers-4.7.0-kali1-all-amd64 - All header files for Linux 4.7 (meta-package) linux-image-amd64 - Linux for 64-bit PCs (meta-package) linux-support-4.7.0-kali1 - Support files for Linux 4.7 xen-linux-system-4.7.0-kali1-amd64 - Xen system with Linux 4.7 on 64-bit PCs (meta-package) |
If you do not have a specific tool in mind, just install the kali-linux-full package.
|
1 |
root@kali:~# apt-get install kali-linux-full |
Lastly, I would like to remind you that you should only test systems that you have explicit permission to do so. Snooping into someone else’s servers is illegal. You wouldn’t want anyone to just barge into your house and look for anything they want, would you?


Hi,
I got a couple of questions.
1) how would i get a remote GUI on it?
2) can i secure the box a bit more?
3) have you played around with hosting vulnerable machines (vulnhub) in the cloud?
For reasons unknown to me the interface was changed from ens3 to eth0 but not sure how to fix it 🙁
The ENS3 interface exist in interface file but when I try to ping it returns Network is unreachable. Any advice would be greatly appreciated.
I looked at it but I’m at a loss as to what to do 🙁
It worked fine until I did the apt-get kali-linux-full. After this completed and I rebooted the machine lost all network connectivity 🙁
I haven’t experimented on it for a while now but I’m guessing it’s not configuring the interface correctly during boot. Have you checked that already?
For reasons unknown to me the interface was changed from ens3 to eth0 but not sure how to fix it 🙁
I will try to replicate your issue when I have time.