Transform your Samsung Smart TV into a Discreet Surveillance Device
This tutorial is for awareness and educational purposes only! The steps below are done on a test smart TV which I have physical access to. Remember – “hack to learn” – not the other way around.
Hardware Used:
- Samsung Smart TV HU9000
- 2x Sandisk USB Flash Drive (at least 8GB)
Procedure:
- Root the Smart TV
- Install Ubuntu
- Install and Configure Motion
Step 1: Root the Smart TV
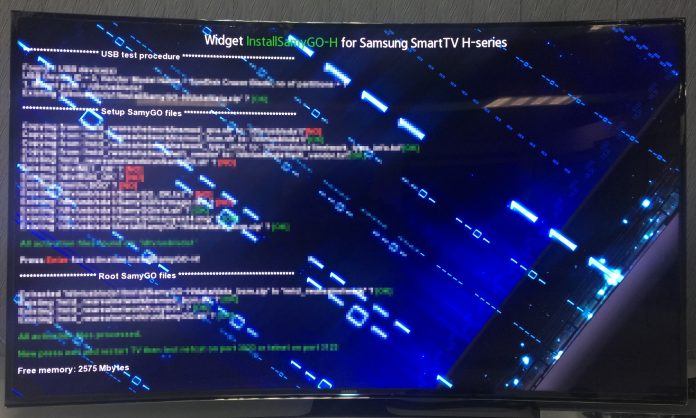
This is just an overview of the rooting process. The detailed step-by-step guide would be available in a dedicated forums that focus on developing the latest rooting scripts and techniques based on the firmware of your TV. The latest techniques are only available to the forum donors. If you are planning to buy a root-able smart TV, be sure to check out the SamyGO forums to confirm if the TV model you are eyeing can be rooted.
- Download files in the SamyGO Forum and put it in the FAT32 formatted USB Flash Drive (rooting USB)
- Follow the initial TV setup as described in the forums
- Run the rooting script from the rooting USB
- Verify root access
Once the device is successfully rooted, there is no need to re-run the script again but there are a few requirements to have the a persistent root during boot-up.
- NEVER remove the rooting USB while the TV is powered on.
- NEVER delete/overwrite the files in the TV’s filesystem. Doing so may brick the TV and it cannot be repaired.
- NEVER update the TV. Latest updates would patch the security hole that made it possible to execute the root script. There is no known procedure in gaining root access in the latest TV firmware.
Step 2: Install Ubuntu
The system in the TV and SamyGO image has very limited command in it. It is also very dangerous to install third-party software directly to the TV’s filesystem. To get around this problem, an Ubuntu can be installed in an external flash drive and have it running on the TV – just as how it ran the SamyGO image. With this, you can try to install any third-party software available for Ubuntu and ran it without risking the system files in the TV.
Login to your rooted TV using SSH. Connect the external flash drive to one of the TV’s USB slot and check the mount point by running:
|
1 2 3 4 |
df -h # In my case /dev/sdb1 |
Un-mount the disk (make you DO NOT accidentally un-mount the rooting USB)
|
1 |
umount /dev/sdb1 |
Format the external flash drive
|
1 |
mkfs.ext2 /dev/sdb1 -F |
Mount the external flash drive
|
1 2 |
mkdir /mnt/core mount /dev/sdb1 /mnt/core |
Download the Ubuntu Image and upload it to /mnt/core using FTP:
|
1 |
http://old-releases.ubuntu.com/releases/ubuntu-core/releases/12.04/release/ubuntu-core-12.04-core-armel.tar.gz |
Extract the Ubuntu Image
|
1 2 |
tar zxvf ubuntu-core-12.04-core-armel.tar.gz rm -rf ubuntu-core-12.04-core-armel.tar.gz |
Copy the necessary files from the TV’s system to the Ubuntu USB
|
1 2 3 |
cp /etc/resolv.conf /mnt/core/etc/resolv.conf cp /etc/hosts /mnt/core/etc/hosts cp /etc/HOSTNAME /mnt/core/etc/hostname |
Chroot to the Ubuntu USB to have a secluded workspace and to avoid accidental modification of the TV’s filesystem
|
1 |
chroot /mnt/core /bin/bash |
The prompt will change to root@(none):/#
|
1 2 3 4 5 |
root@(none):/# mount -t sysfs sysfs /sys root@(none):/# mount -t proc proc /proc root@(none):/# mount -t usbfs none /proc/bus/usb root@(none):/# mount -t devpts devpts /dev/pts root@(none):/# mount -o bind /dev dev/ |
Set the environment variables
|
1 2 3 4 |
root@(none):/# export LD_LIBRARY_PATH="" root@(none):/# export HOME="/root" root@(none):/# export TMPDIR="/tmp" root@(none):/# export FONTCONFIG_FILE="/etc/fonts/fonts.conf" |
Create the video node
|
1 2 |
root@(none):/# mkdir /dev/sam root@(none):/# mknod /dev/sam/video0 c 81 0 |
Edit the /etc/apt/sources.list and append the following
|
1 2 3 |
deb http://ports.ubuntu.com/ubuntu-ports/ precise main universe multiverse restricted deb http://ports.ubuntu.com/ubuntu-ports/ precise-security main restricted deb http://ports.ubuntu.com/ubuntu-ports/ precise-updates main restricted |
Install the necessary software
|
1 2 3 4 |
root@(none):/# apt-get update root@(none):/# dpkg-divert --local --rename --add /sbin/initctl root@(none):/# ln -s /bin/true /sbin/initctl root@(none):/# apt-get install dialog apt-utils vim sudo ssh net-tools ethtool wireless-tools network-manager iputils-ping rsyslog alsa-utils lsof htop |
We now have an Ubuntu image running from the external USB. Once chrooted, all the software that you want to install would be saved in the external USB instead of the TV’s filesystem.
Step 3: Install and Configure Motion
What is Motion?
Motion is a program that monitors the video signal from cameras. It is able to detect if a significant part of the picture has changed; in other words, it can detect motion.
We would use this software to stream the images from the TV’s camera. If you would like to read the detailed documentation, you may do so at the developer’s website.
Let’s proceed and configure our Ubuntu USB for Motion.
Set the correct permission for the video node
|
1 2 |
root@(none):/# chown root:video /dev/sam/video0 root@(none):/# chmod g+rw /dev/sam/video0 |
Create the motion directories and copy the default configuration file
|
1 2 3 4 |
root@(none):/# mkdir /root/.motion && cd root@(none):~# mkdir ~/images root@(none):~# cp /etc/motion/motion.conf ~/.motion/ root@(none):~# mkdir /var/run/motion |
Open the ~/.motion/motion.conf file and edit the following lines:
|
1 2 3 4 5 6 7 8 9 10 11 12 13 |
daemon on videodevice /dev/sam/video0 v4l2_palette width 1280 height 720 framerate 60 target_dir /root/images webcam_quality 75 webcam_maxrate 60 webcam_localhost off control_port 8082 control_localhost off control_authentication username:password |
set your username and password
All is ready and set to run Motion
|
1 |
root@(none):~# motion |
If the motion daemon ran without any issue, the TV camera stream can now be viewed through the Motion’s web interface by going to the following URL:
|
1 |
http://TVIPADDRESS:8081 |
where TVIPADDRESS is your TV’s local IP address.


